Koha How-To
Monday Minutes: Customizing Your Issue Slip
Customizing the Issue Slip
Using Slip in News Feature
The content that will be added to your Issue Slip will come from the News Feature! To customize your issue slip, the first step would be to create the content.
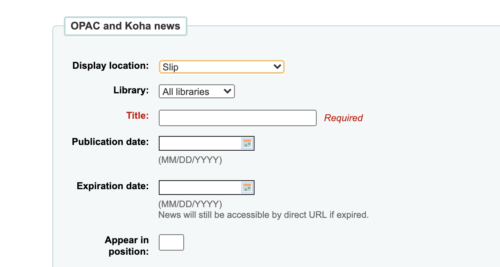
In the News Feature found under Tools, create a new entry and choose the location of 'Slip'. This will tell Koha that the information you place here will display in the Issue Slip.
The top half of the form is useful if you would like to add a publication date and expiration date for this specific content you are adding.
Also, the position is important if you have more than one entry for Slip, this will tell Koha which entry should be first, second, etc.

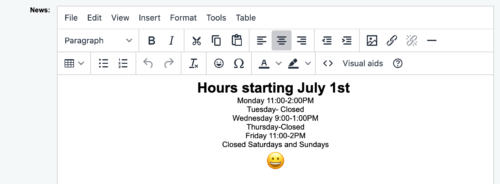
The bottom half of the form is where the magic lives. Koha presents a nice WYSIWYG (what you see is what you get) which allows you to use the tools presented in this editor, such as the size of the font, text centering, and inserting images/links! This form is so great since there is no HTML required unless you wish to use HTML.

Adding the Slip Content to the Issue Slip
Once you have created content in the News feature, you will then need to add this content to your Issue Slip. The issue slip will be found in Notices & Slip under Tools.
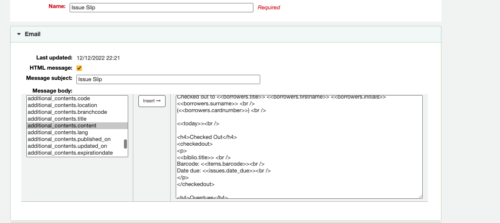
When editing the Issue Slip, you will want to edit the content in the "Email" tab- although yes, you are printing the slip!
On the left-hand side of the Slip form, there are fields that Koha can pre-populate information into the slip for the library. The news content will be close to the bottom of the list, under the Heading Additional Contents, and is called <<additional_contents.content>>. This will put anything that you added to the News box.

During our tutorial video, Jessie mentioned that our Issue Slip we were showing also had some styling. There is some HTML to adjust the way the News portion would look at the bottom of the slip. Here is that styling that we showed during the video:
<h4 style="text-align: center; font-style:italic;">News</h4>
<news>
<<additional_contents.content>></p>
</news>
<style>
 #receipt {
 width: 3in;
 }
</style>
This HTML is styling the word 'News' in italics and also making the width of the text to be limited to 3in. The limitation is accommodating for printing this up with a receipt printer.
In between the <news> tags, you will see where the <<additional_contents.content>> is living.
**NOTE**
If you choose to add HTML to this notice or any notice, make sure the checkmark box for HTML is checked in the notice, to indicate that this notice is using HTML.
QR Code
During the tutorial video, we also showed using this feature to promote the OPAC through a QR code printed on the issue slip. Having a QR code for your users to scan with their phone- which can bring them to the OPAC, library website, or somewhere else is extremely helpful! We have heard from a lot of libraries enjoying the QR feature added to the OPAC, so we thought we would share how to do it on the slip also.
We used this link to create a QR code for our OPAC link. This service will take the URL you provide and generate a QR code to download. To add images to the News feature, a library must either host their own images, or if your library does not have this ability, we can host the image for you.
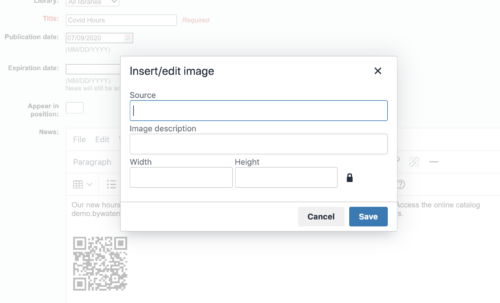
For libraries that will host your own image, the source URL will be added to the News feature when clicking on the Add Image button.
For libraries that would like us to host an image for you, please send us the image in a ticket, and we can assist!

Update
We have updated these directions due to a change in terminology for the Notices and Slips part, the video is not currently updated, so please follow the written directions for editing the slip itself. Just a summary of what has changed in Koha since this tutorial was published:
Notices and Slips
<<opac_news.content>> has changed to <<additional_contents.content>> as of 21.11
Other News Features
Monday Minutes: Utilizing the New! News Feature for OPAC Customization
Video Tutorial on Using the News Feature in Koha
Happy Birthday Monday Minutes
Jessie and Kelly are so happy to celebrate our 1st Anniversary of Monday Minutes! Thank you everyone for watching and we look forward to more Monday Minute fun! In total, we have produced 48 episodes! WOW!
Read more by Kelly McElligott

